
Connecting Xero
Connecting Xero brings in invoices, contacts, payments, manual journals and bank transactions, kept up to date automatically. You need the admin role in Sprint Satellite and a Xero login with access to the organisation.
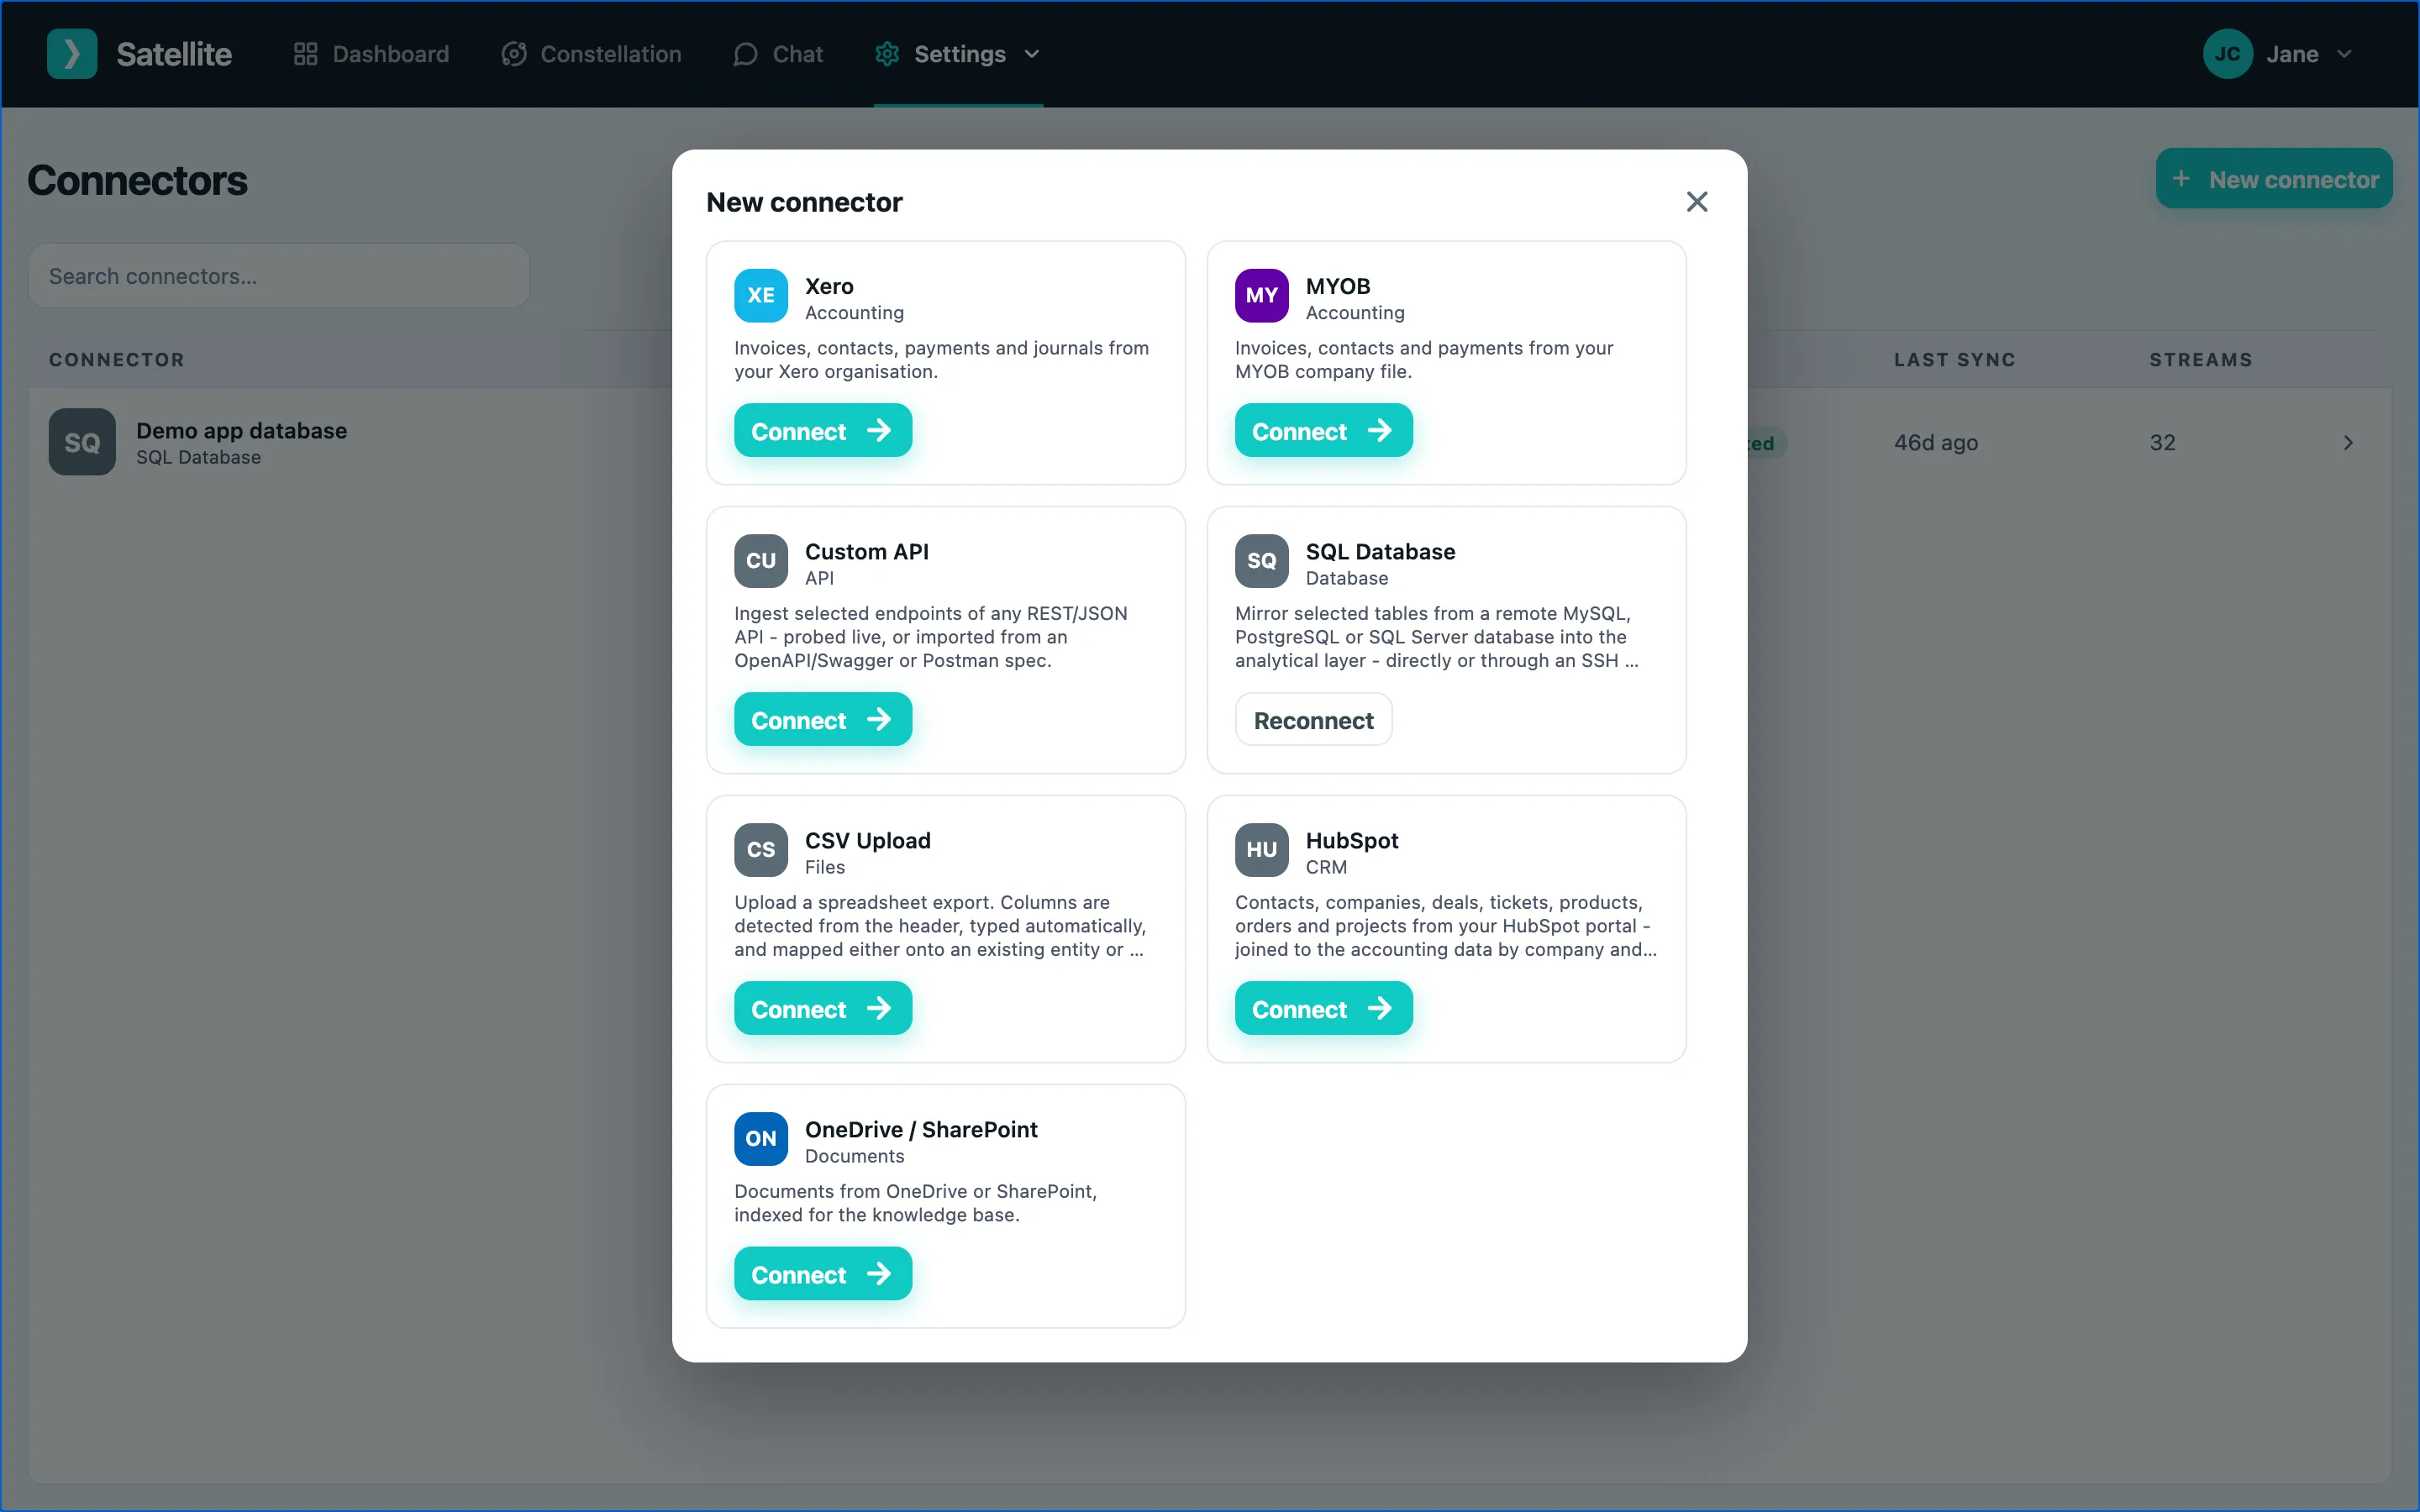
Step 1 - start the connection
Section titled “Step 1 - start the connection”- Go to Settings → Connectors.
- Click New connector.
- Choose Xero from the gallery.
Step 2 - sign in to Xero
Section titled “Step 2 - sign in to Xero”Your browser goes to Xero’s own login page. Sign in with your Xero email and password (and Xero’s own two-factor code if you use one). Sprint Satellite never sees these details - you are signing in to Xero directly.
Step 3 - allow access
Section titled “Step 3 - allow access”Xero shows what Sprint Satellite is asking to read. Choose the organisation to connect if you have more than one, then click Allow access.
Sprint Satellite only asks for read access to accounting data - it never writes back to Xero.
Step 4 - confirm the organisation
Section titled “Step 4 - confirm the organisation”You are returned to Sprint Satellite. If your Xero login can see more than one organisation, pick the one to connect and confirm.
Step 5 - first sync
Section titled “Step 5 - first sync”The connection appears in the Connectors list, first as Syncing and then Connected once the initial import is done. Open it to see each stream and how many records came in.
Data refreshes on a schedule from then on. You can also click Sync now on the connector’s Manage tab.
Try it
Section titled “Try it”Open Chat and ask something like “What was our total invoiced revenue last month?” or “Who are our top 10 customers by invoice value?” - see Asking questions.